Recommend our courses to your online social circle & start earning a Huge 30% commission
This page provides you with a concise overview of the help document, along with clear guidance on effectively utilizing it. You'll also find helpful images that are designed to assist you in easily finding the information you're looking for.
This page provides you with a concise overview of the help document, along with clear guidance on effectively utilizing it. You'll also find helpful images that are designed to assist you in easily finding the information you're looking for.
Recommend our courses to your online social circle & start earning a Huge 30% commission
Step 1: Sign up by filling in all the details at this link https://guvigeek.tapfiliate.com/
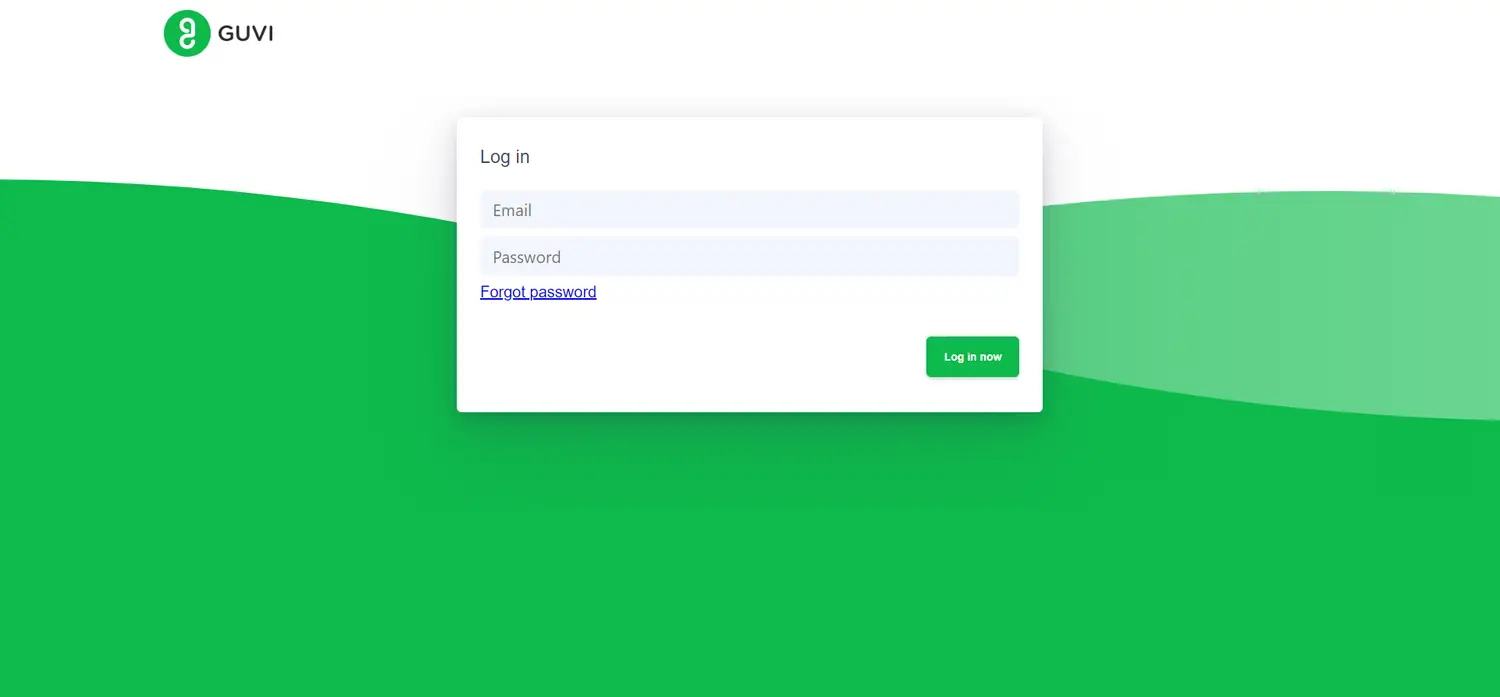
Step 1: Visit https://guvigeek.tapfiliate.com/ & click on the ‘Log in’ button at the top right of the screen.
Step 2: Enter your credentials(Signed up email address & password) & click on ‘Log in now’ to login.
Step 1: Login using your credentials at https://guvigeek.tapfiliate.com/
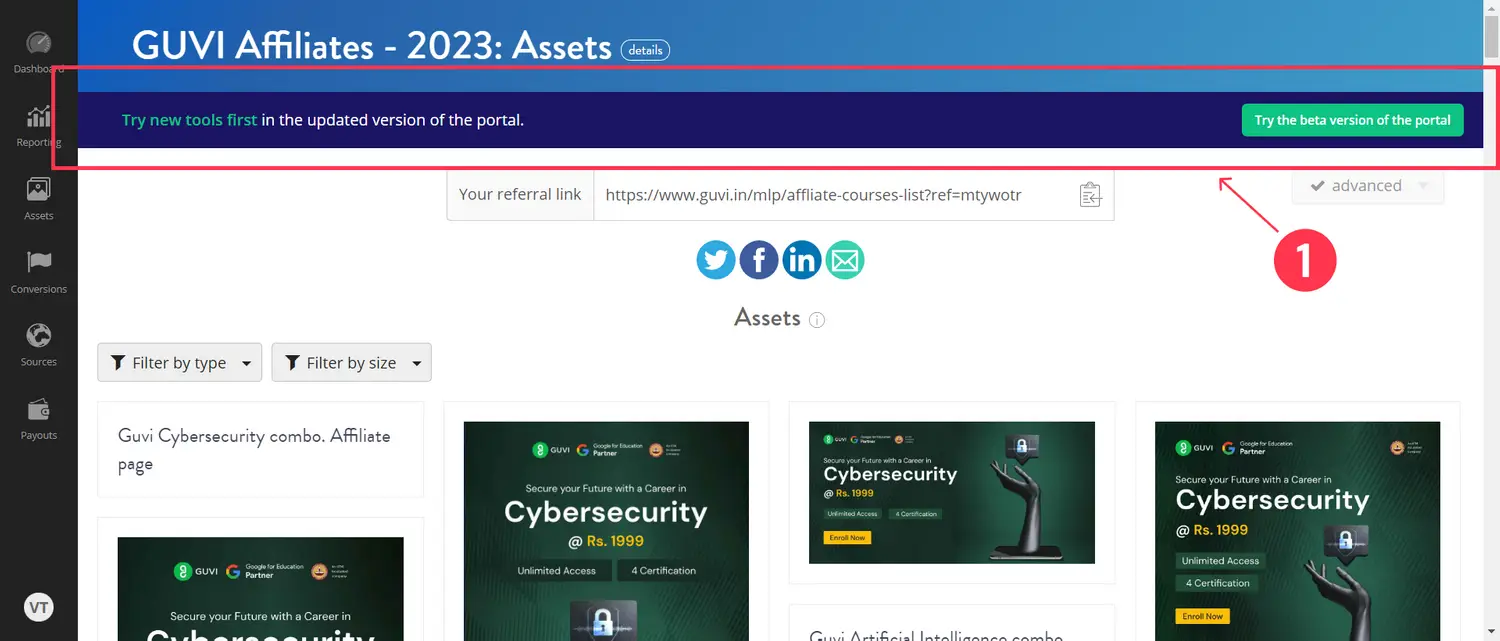
Step 2: Click on "Assets" on the sidebard and click on "Try the beta version of the portal". (Refer point 1 in the below image)
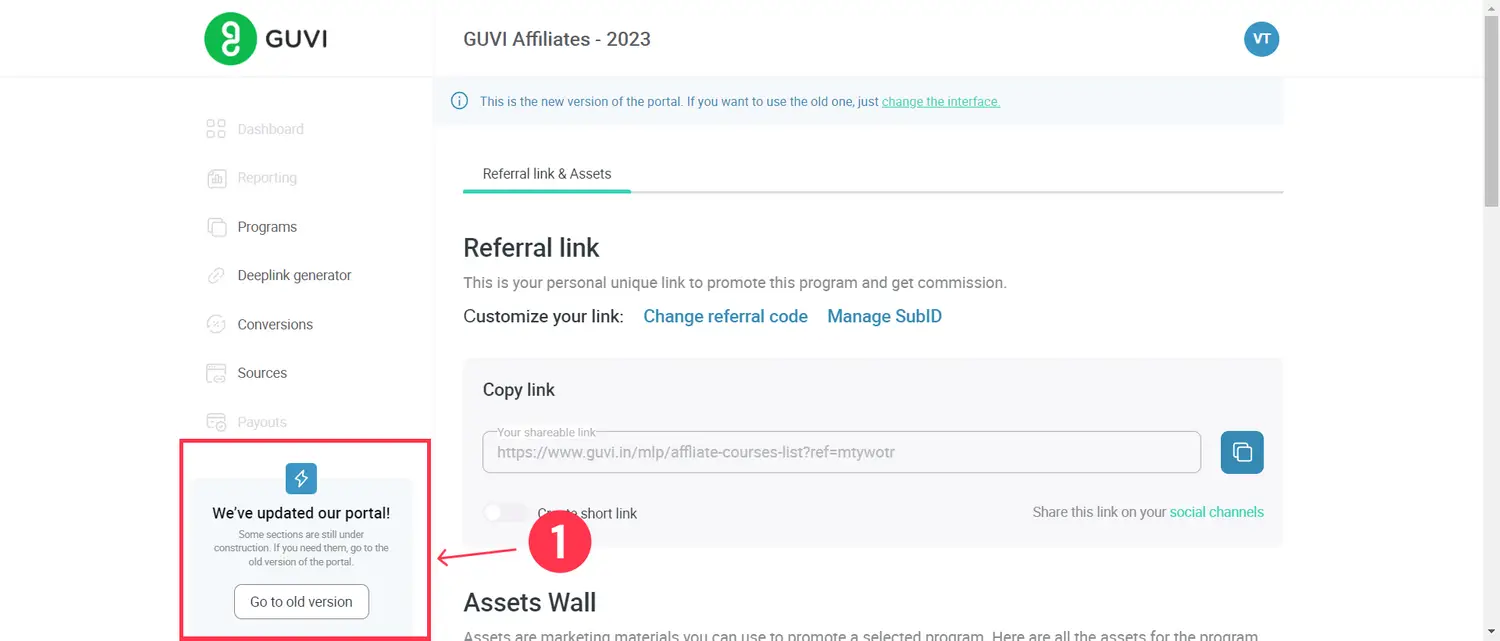
Step 3: To switch to the old version, Click on the ‘Go to old version’ at the left bottom of the screen. (Refer Point 1 in the below image)
Step 1: Login using your credentials at https://guvigeek.tapfiliate.com/
Step 2: Your affiliate dashboard will appear on the screen.
Step 3: Click on ‘Programs’ on the sidebar menu at the left of the screen.
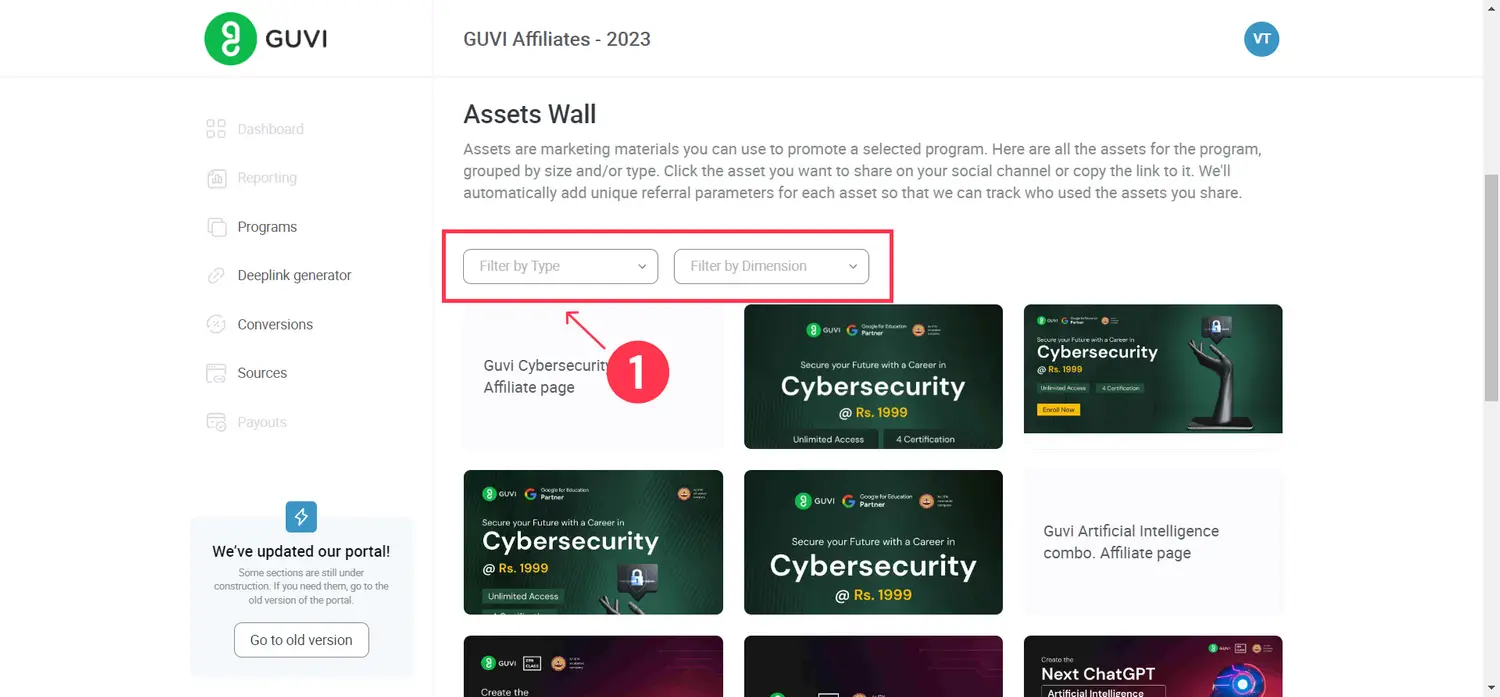
Step 4: Click on ‘View’ to access your approved advertising/promotion assets related to your preferred EdTech Service of GUVI.
Step 5: You can use your referral link to promote the GUVI EdTech products on your advertising platforms.
Step 6: You can also download the advertising assets(images) and use them for promotions or advertising in your network.
Kindly ensure to hyperlink the referral links to the appropriate advertising assets such that when a purchase is made through your referral link, it gets eligible for earning income.
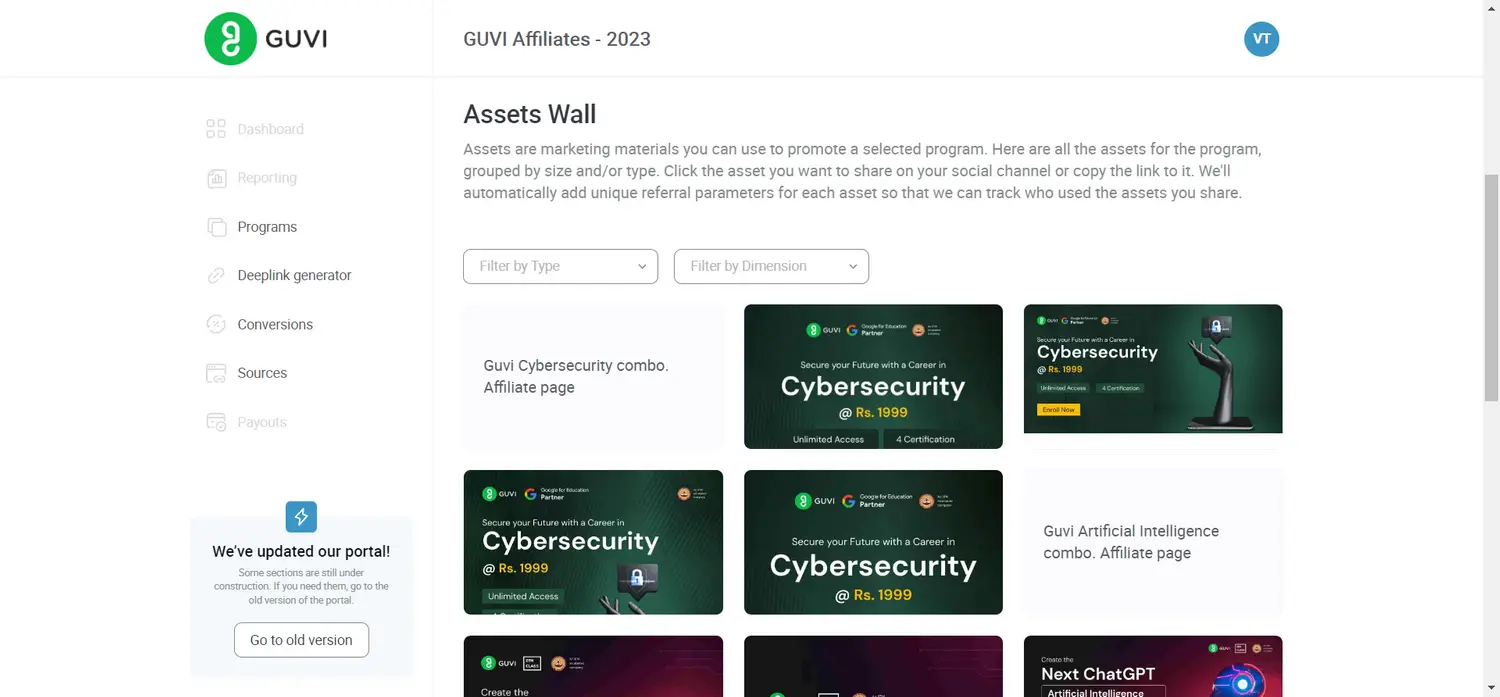
Click on the ‘Filter by type’ to choose between the asset type. For example, you can click on ‘Banners’ in this drop-down menu to get the banners based on GUVI’s EdTech Products.
Likewise, you can click on ‘Filter by Dimension’ to choose the size of the asset that you wish to use for promotion.
Step 1: After logging in to your account, you will find a dashboard appearing on the screen. If not, click on the ‘Dashboard’ on the sidebar menu at the top left of the screen.
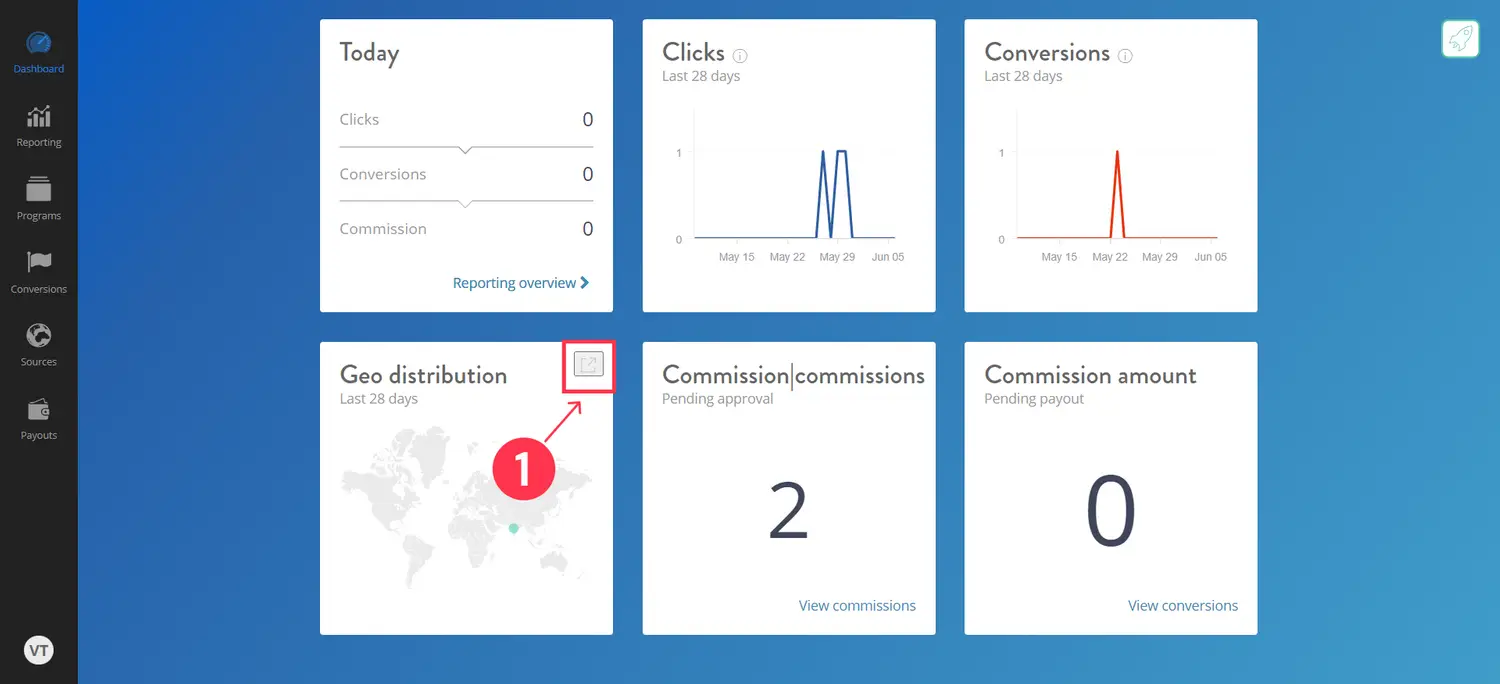
You can find a detailed analysis of your promotions through 6 categories(Today, Clicks, Conversions, Geo distribution, Commission(s), Commission amount) in the Dashboard.
a) Today
Clicks: This indicates the total number of clicks made by your audience through the referral links today.
b) Conversions: This indicates the total number of purchases(conversions) made by your audience through the referral links today.
c) Commissions: This indicates the total number of eligible commissions earned by you through the referral links today.
d) Clicks
This graph indicates the clicks made within the recent 28 days. A click is tracked whenever a visitor clicks on an advertising asset (e.g. clicks on a referral link or banner). Clicks show up in this graph in real time.
e) Conversions
This graph indicates the conversions made within the recent 28 days. A conversion is tracked whenever a visitor purchases through your placed advertising asset (e.g. purchase made through your referral link or banner). Conversions show up in this graph in real-time.
f) Geo Distribution
This map shows the geographical locations(countries) from which the clicks and conversions were made through your referral links within 28 days. Click on the open link icon (refer point 1 in the above image) at the top right of Geo Distribution to get a filtered version of geo-distribution according to clicks & conversions made.
g) Commission(s)
This shows the number of commissions that are pending to get approval from the GUVI team. Click on ‘View commissions’ at the right bottom to get a detailed report of your pending commissions.
h) Commission Amount
This shows the amount pending for payout after the approved commissions(which happens after purchases are made) from the GUVI team. Click on ‘View conversions’ at the right bottom to get a detailed report of your pending payouts.
Step 1: After logging in, click on the ‘Conversions’ on the sidebar menu at the left of the screen.
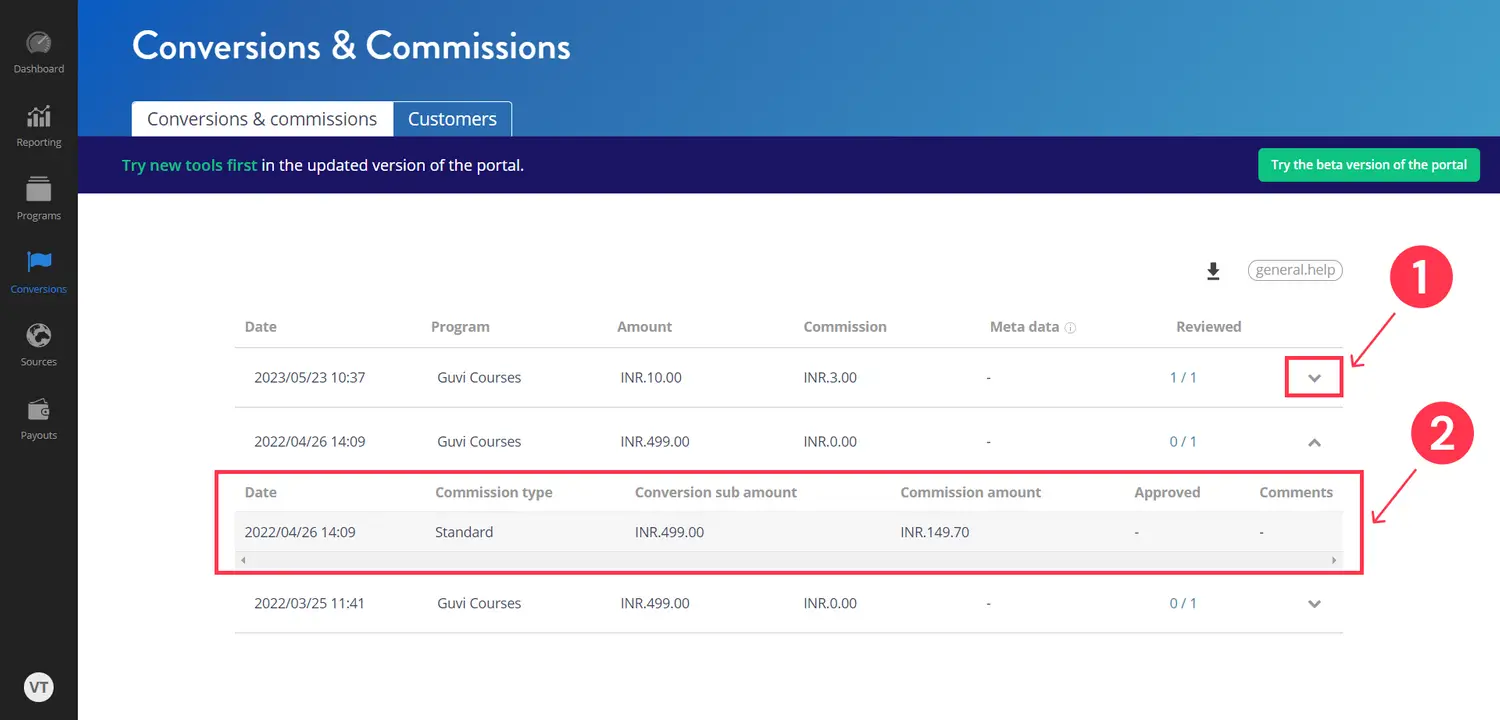
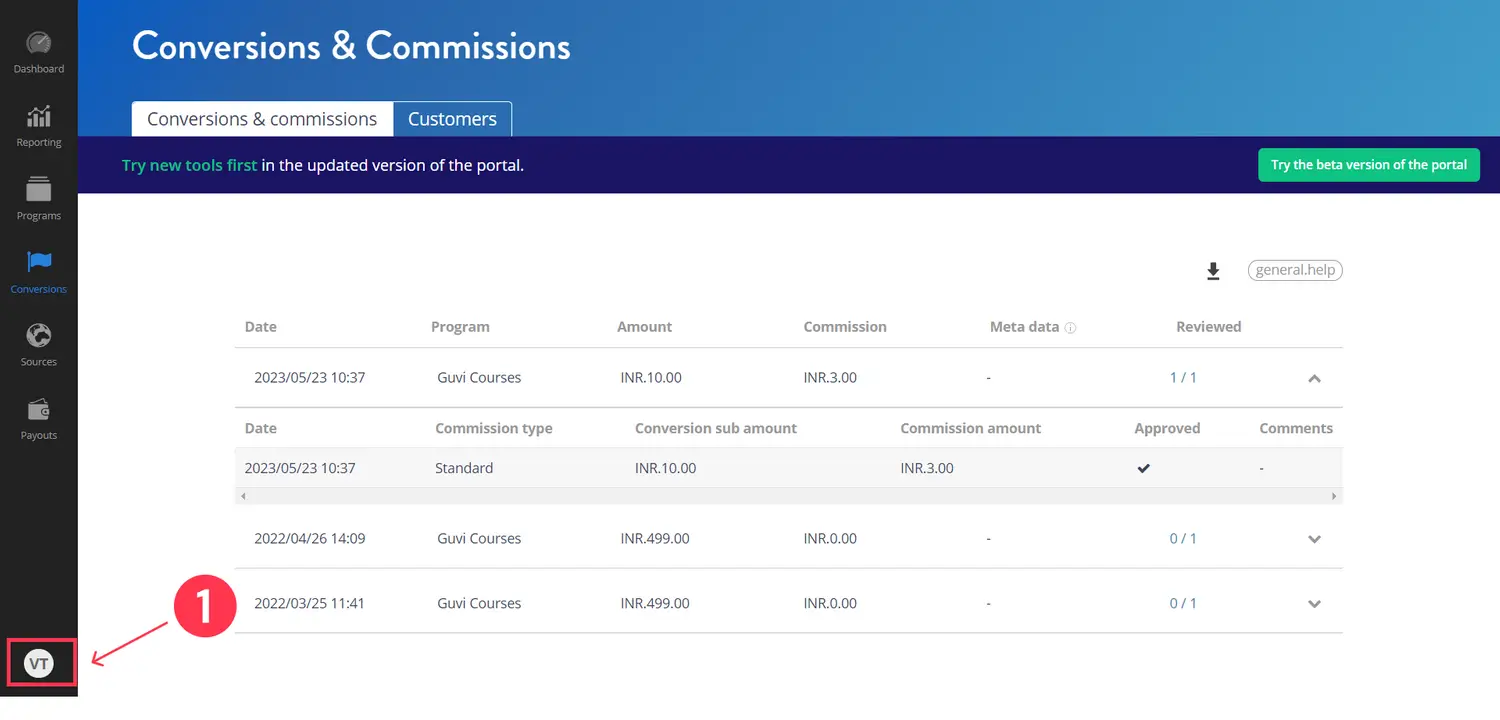
You'll be able to see the details of the purchases(conversions) made on GUVI’s eligible EdTech products & services through your referral links. This page indicates the amount of the GUVI Product purchased & the eligible commissions that you will receive after a review done by the GUVI team.
Step 2: Click on the below arrow to get the details of the approval status given by the GUVI team on your eligible commissions (Refer points 1 and 2 in the below image).
It is possible that you would have promoted a banner or referral link on more than one networking platform. You can find the source of the purchase made by following the step below.
Step 1: After logging in, click on the ‘Sources’ on the sidebar menu at the left of the screen.
(or)
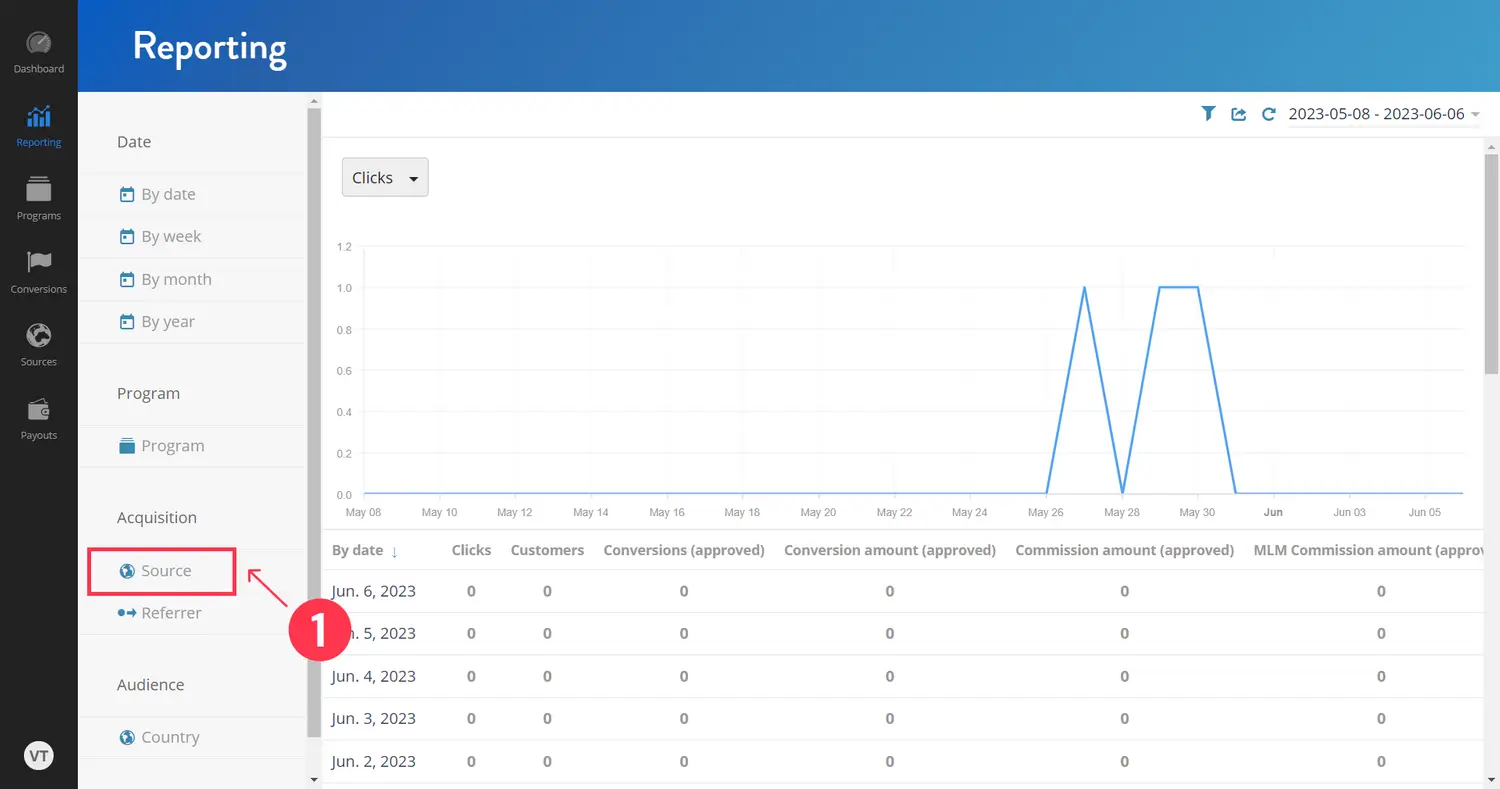
Step 2: After logging in, click on the ‘Reporting’ on the sidebar menu at the left of the screen.
Step 3: Click on the ‘Source’ on the sidebar menu at the left of the screen of the ‘Reporting’ page. (Refer point 1 in the below image)
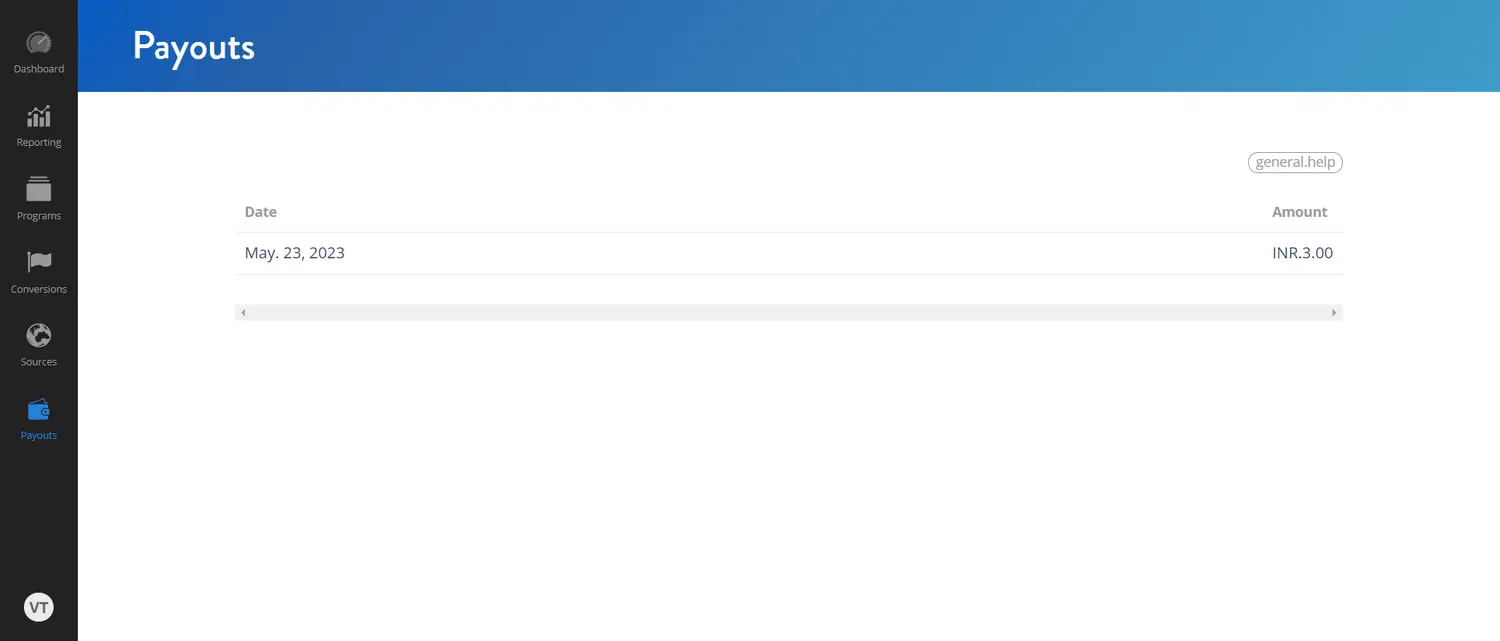
You can track your earned advertising income(commission) that GUVI has processed to your bank account here with the transaction date.
Step 1: After logging in, click on the ‘Payouts’ on the sidebar menu at the left bottom of the screen
Step 3: Click on the ‘Sources’ on the sidebar menu at the left of the screen of the ‘Reporting’ page.
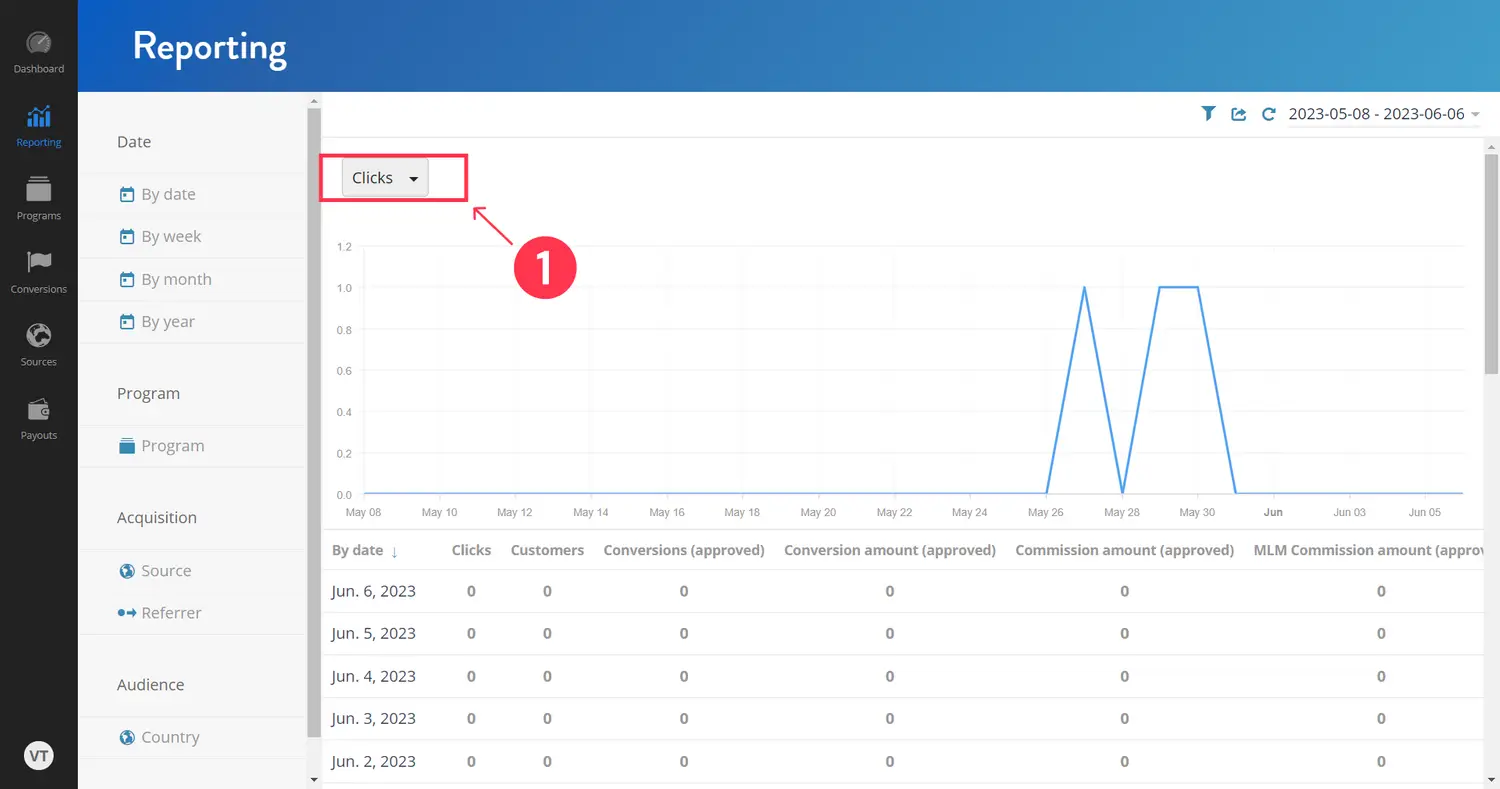
This page shows a graphical representation of the clicks, conversions & commissions earned. You can filter the date accordingly by clicking on the drop-down menu
This data is represented based on a daily, weekly, monthly, & yearly basis. Click on the left sidebar menu of the ‘Reporting’ page to view the graph ‘By date’, ‘By week’, ‘By Month’ & ‘By year’.
You will be able to find the in-depth details under the graphical representation.
Step 1: Click on the profile icon
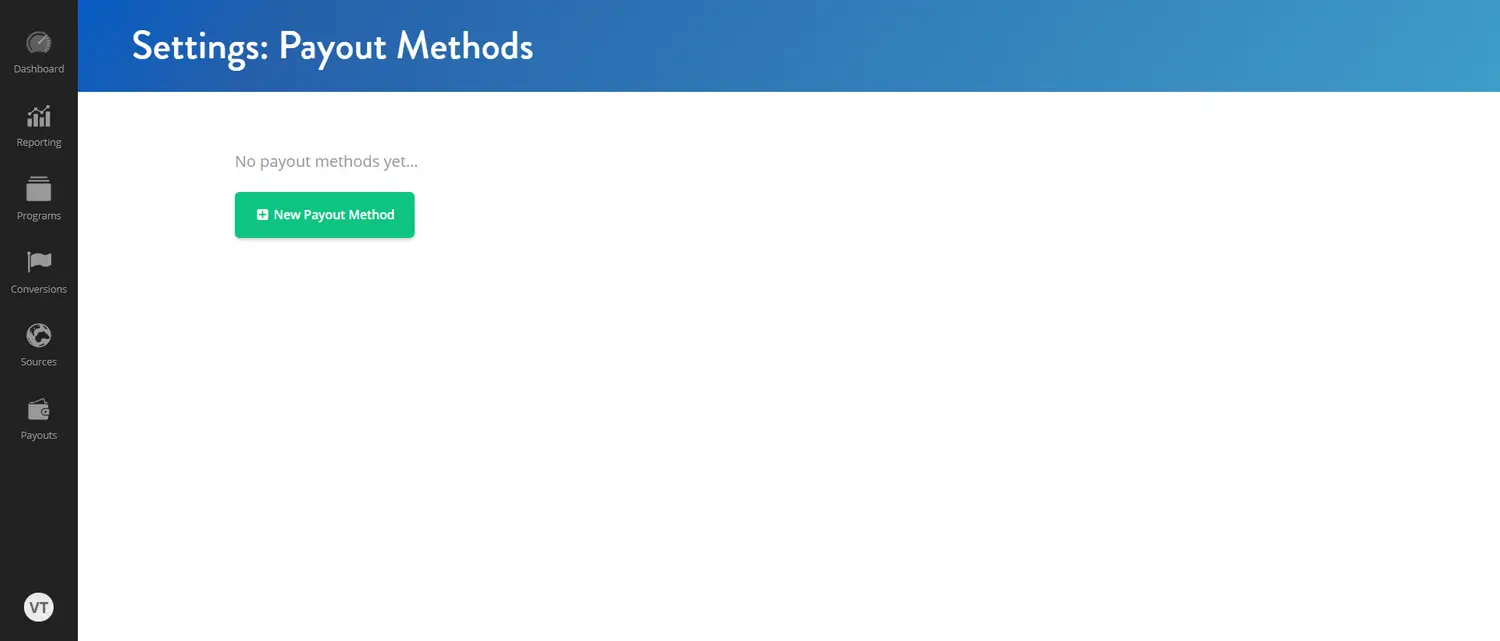
Step 2: Click on ‘Payout Methods’ and then click on ‘New Payout Method’ if you want to add new details.
Step 3: Choose your Payout Method from the payout methods: 1. PayPal 2. Bank details
Step 4: Fill in the details & click on ‘Add’
For Password:
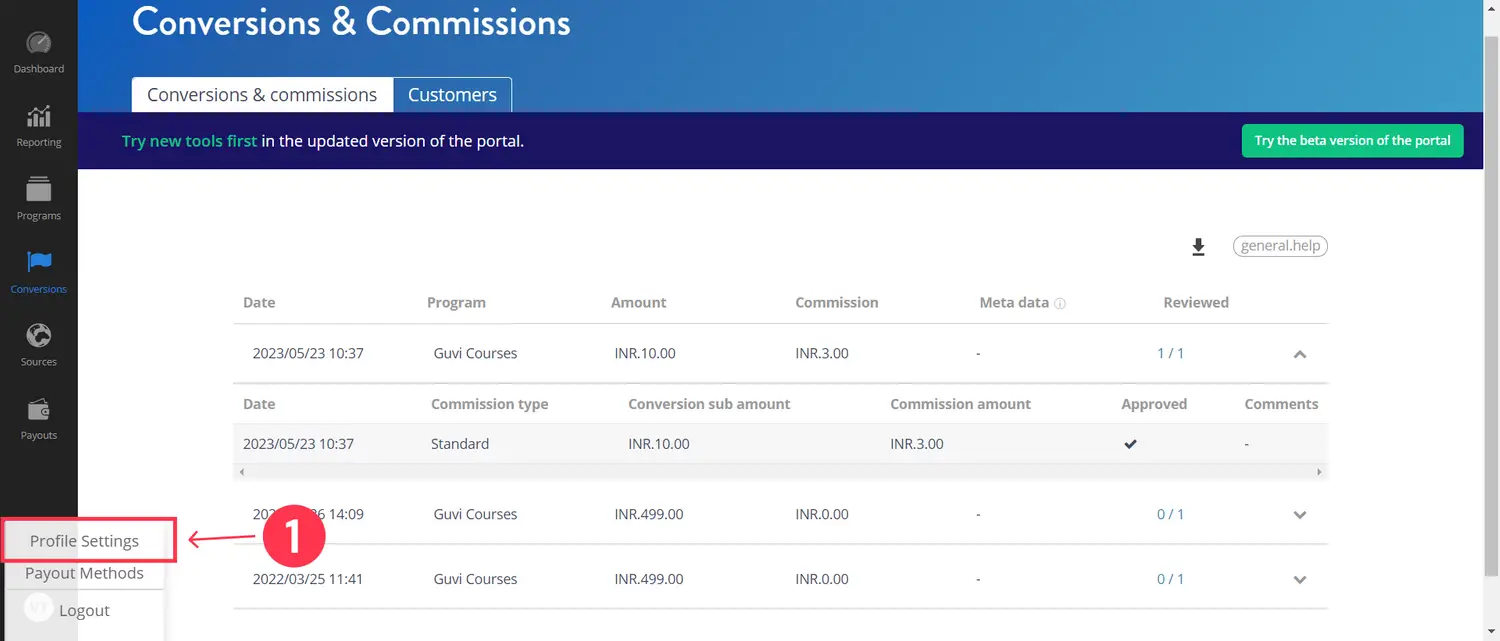
Step 1: Click on the profile icon at the bottom left corner of the screen.
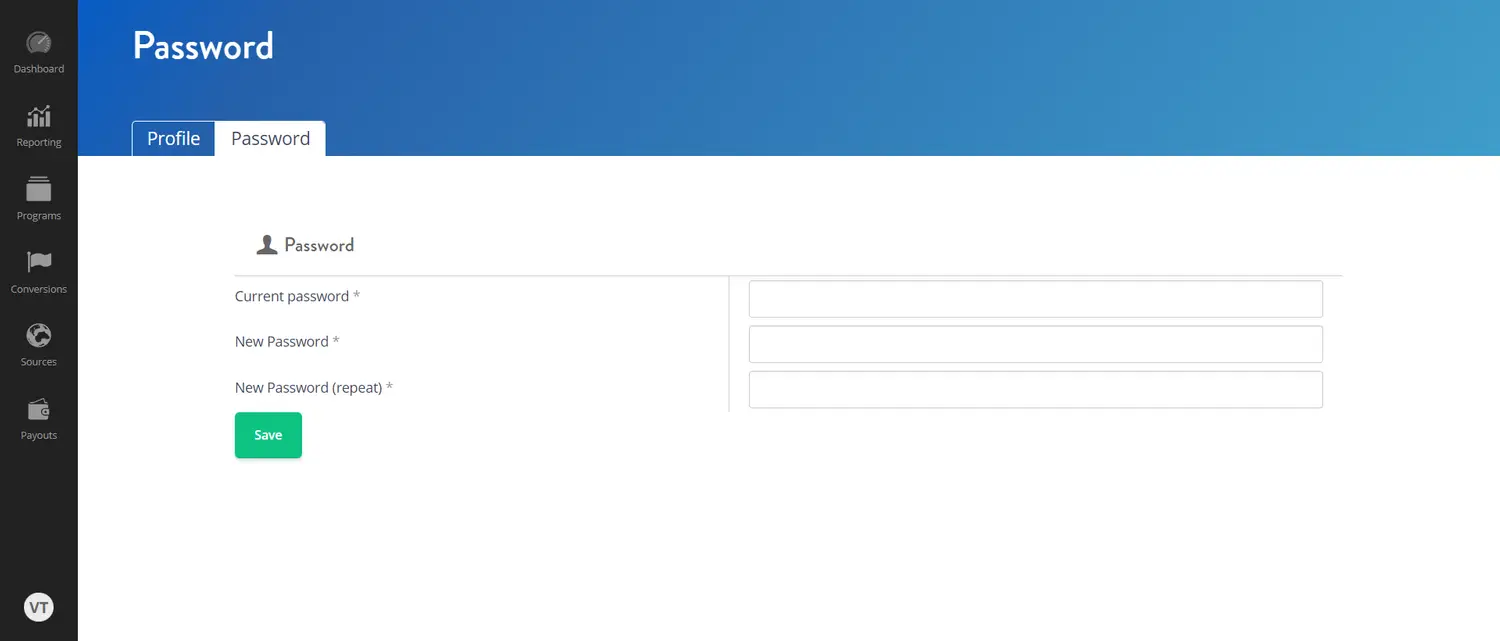
Step 2: Click on ‘Profile settings’ and then click on the ‘Password’ tab.
Step 3: Fill in the Current password, New Password, and New Password(repeat) & click on ‘Save’ to change your password.
For Profile Settings:
Step 1: Click on the profile icon at the bottom left corner of the screen.
Step 2: Click on ‘Profile settings’ and then click on the ‘Profile’ tab.
Step 3: Fill in the details & click on ‘Save’ to update your profile.

